A small concrete slab provides a level surface to hold barbecue grills or garden benches in place, and with proper preparation can be completed within two days of pouring and finishing the concrete.
Your options for concrete deliveries include both ready-mix trucks and bagged concrete mix. When mixing it yourself, use a sturdy wheelbarrow equipped with an efficient mixer featuring a high blade speed for mixing purposes.
Preparation
Thickness of concrete slabs Melbourne plays an essential role in its load-carrying capacity. Patio slabs typically are constructed using four inches thick slabs; for heavier loads you may increase strength by placing five inch slabs instead.
Before commencing a concrete pour, you must clear away any obstructions, compact the soil and level it if necessary. For larger slabs, consider splitting it in two and pouring one half at a time to ease handling more concrete at one time.
Make sure the form boards are at the correct height by measuring with a carpenter’s square and cutting them squarely to size. Nail a 2×12 cleat across the top of each board to keep it securely in place – bearing in mind you will be nailing into concrete! If using reinforcing mesh, ensure it is elevated on plastic bar chairs so it will hit in its true centre during concreting and completely cover it up when concrete is poured over it.
Mixing
Your options for purchasing ready-mix concrete range from having it directly delivered to your site to bagged mix at home improvement centers that you mix yourself in a wheelbarrow. Whichever route you take, always ensure you adhere to manufacturer instructions when mixing concrete.
Before commencing with pouring, first level the site by driving stakes at each corner of the slab area and using a mason’s line level between these stakes to assess grade of site as a reference for form boards.
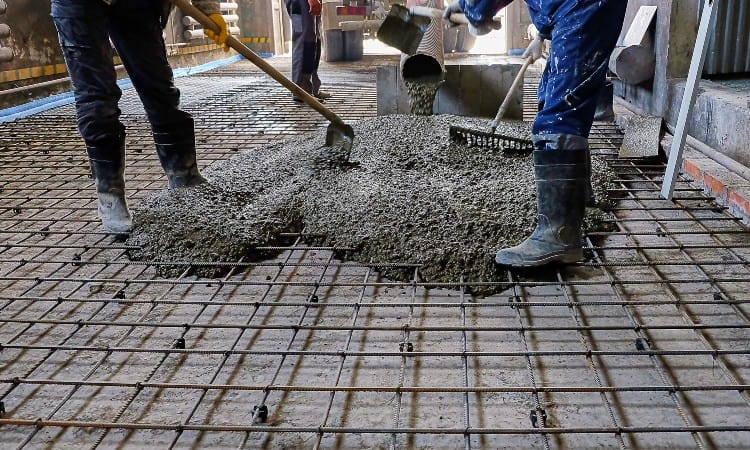
As soon as concrete has been poured, work must begin swiftly before it sets. Use a tool known as a bull float to carefully smooth its top surface before rounding its edges with an edger after any surface water has dissipated and the slab has firmed. Grooving concrete allows controlled shrinkage that minimizes random cracking by placing grooves every 10 feet for small slabs or every two for large ones – cut grooves every two feet on small slabs for optimal results.
Pouring
As it might seem counterintuitive, pouring a small concrete slab, such as one for a deck stair landing or pad for a propane tank, requires many of the same techniques and approaches used when working on larger projects. Begin by prepping your site by calling “call before you dig”, to notify utility companies to mark locations of pipes and wires before leveling your site and driving stakes in each corner of your slab area; nail form boards cut to length to each stake before stretching a mason’s line across them all before bracing them with two pairs of 2x4s spaced two feet apart – similar methods are used when working on larger projects!
Pour the concrete when its most workable, ideally on a moderately warm and rain-free day (see Pouring Concrete in Rain). Following pouring, tamp down any rebar mat or wire mesh to release air bubbles; elevate rebar using chairs so it hits directly in the center of your slab.
Finishing
No matter whether you use bagged concrete mix or order ready-mix concrete, it is crucial that the amount required for pouring is precisely estimated. Overestimating can result in running short of material before beginning work on your pour, diminishing its strength and durability over time.
Make sure to tap the sides of your form with a hammer to release any air bubbles and ensure the concrete fills all gaps and crevices. Alternatively, screeding is another effective technique used to level and smooth out wet concrete by moving a straight piece of scrap lumber (such as 2×4) across it in an sawing motion over top of wet concrete surface.
If you’re building a long, rectangular slab, make sure it is square by measuring diagonals at each corner to verify they are equal and then bracing short sides of slab with 2×4 stakes driven into ground or attached to form boards if necessary. For an attractive non-slip finish use a bull float brushing or skimming concrete surface surface.